Bird & Feathers
I've heard that feathers are the hardest thing to create in grooming, so I decided to take on this challenge during my final year of college.
The software I used is Houdini and these are the plugins I used for the process:
-
The feather tool for Houdini by Tighe Rzankowski: https://gumroad.com/l/featherToolsLC (It is such an Amazing tool! I couldn't do this project without this tool).
-
Groombear tool by kwac, https://gumroad.com/kwac#yndnV (this makes grooming in Houdini a lot more fun and comfortable).
-
And of course, Houdini, my new favorite 3D package.
To start the project, the first thing I did was gather references.

I used this article, “Everything You Need To Know About Feathers”, to learn more about the different kinds of feathers and where they are located on the bird’s body.
https://academy.allaboutbirds.org/feathers-article/
From the references I gathered, I learned that the wing and tail feathers are more straightforward than the others. The body feathers turned out to be too heavy if I were to recreate them exactly as they are in real life. Instead, I decided to create only the Contour Feathers and Semiplume Feather. For the down feather, Filoplume and Bristlel, I decided to create a dense, short base-groom using the grooming tool in Houdini.
R&D
With my plan in mind, it was time to put it to action. The first question was: how should I create the feathers? From my references, I saw that the feathers on the head were dense and small. Also, since the shape of a bird head is complex, I decided to just use the grooming tool to create the groom for the feathers. I did want to use the feather tool for the body. The challenge that arose was deciding where I should place feathers and how to blend between them. I created 3 methods for a proof of concept:
Method01:
Feather Instance

Method02:
Just Groom

Method03:
Combine both

Fortunately, I had the privilege of talking to Mikki Rose, Senior Fur TD at Blue Sky Studios about my project. She suggested that I stick with method one, and use different feathers for different parts of the body.
Feather Creation
By using the feather tool for Houdini by Tighe Rzankowski, this part was very easy and straightforward. All I had to do was drop down a feather generator node and tweak the parameters.
But before that, back to the references. The specific type of bird I chose was a Chickadee.


And this is what I created in Houdini.

Feather Groom
First I created the base groom. I follow the flow of the fur and add a lot of noise.
For the head groom, I also just used the grooming tool in Houdini with the help of the Groombear plugin.


For the head groom, I first painted the density map. For length, I multiplied the density value by -1 so the value was inverted, and I used a fit function afterward to get to the value range I wanted. This became the starting point of the length of the hair. I fine-tuned it in grooming by brushing it using the Groombear tool.
Density Map
Clump 01


Clump 02

Noise & Cut

For the body Groom, I followed Tighe's feather tool tutorial. I painted maps for regions of different feathers. I only used two different kinds of feather for the body. A smaller one with more noise for the ring at the neck, and a bigger, flatter one for the rest of the body. I created a guide groom with the grooming tool, the Feather Groom node (which will take the feather variations), my input, and the body mesh and instanced the feathers where the guide is.
Feather Variations with for loop

Input Guide Groom

Feather Instance

Because of the shape of the wing, I had a lot of trouble with instancing the feathers using the feather tool. I also tried to use the skin normal and the tangent direction to copy to point, but the results still weren't that good. So, for the rest of the feathers, I placed them by hand.

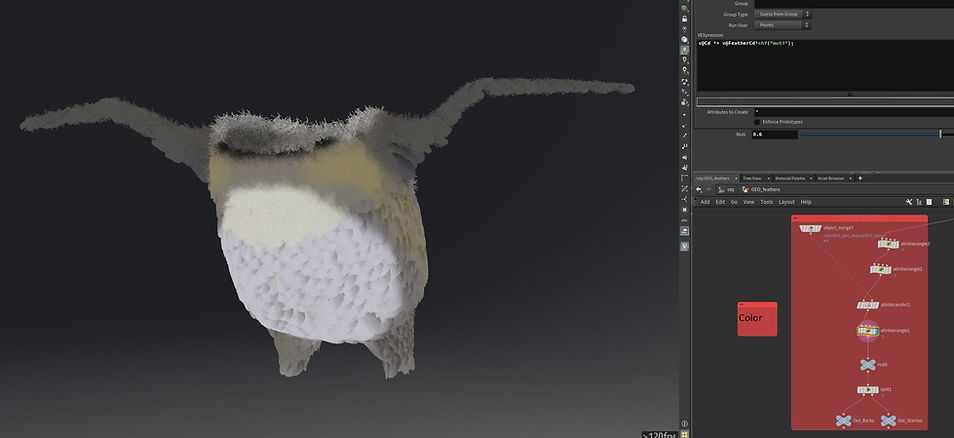
Shading
For the color of the body feathers, I wanted to mix the body texture base color with the feather color. So I imported the texture and baked the color onto the point Cd attribute. I renamed the Feather Cd attribute to FeatherCd, and v@Cd *= v@FeatherCd*chf("muti"); to multiply the two colors with a float number as bias.
Wing Feather Deform
I decided to deform the wing feather with the rig. Luckily, the feather tool has a feather deform node based on the name attribute. I simply had to transfer back the name attribute to the cached animation from Maya.

Soft Body
I used vellum for the soft body sim. First I tried to use the vellum tetrahedral soft body shelf tool for the sim. However, since I only wanted to simulate the belly and pin constraint the rest of the body back to the animation, I had trouble pinning and painting attributes for the constraint points inside the body. Based on Entagma's soft body simulation using grain, I decided to use both grain and cloth and constraint them together using connected adjacent pieces to recreate my tetrahedral mesh. I was able to transfer the attributes I painted on the skin to the grains inside the body and pinned the points inside the body to create a more stable simulation.

Feather sim
I separated the feathers around the wing area and the rest of the body. The wing area I used point deform to warp the geo onto the body and let it deform with the animation. The rest of the body feather I used a proxy geo for sim using vellum cloth and used that to deform my feathers post-simulation. Thanks to the demo file Tighe provided in the feather tool demo, I already had a foundation for the set up. A ramp for the pin constraint stiffness drop off from root to tip was created using uv. I also painted a map and multiplied them together to give different areas of the body more or less stiffness.
The trickiest part was the area between the body and the wing. The feather detangle tool Tighe created was great for the rounded part of the mesh, like the belly, but couldn't fix the intersecting mesh around the root of the wing. I couldn't think of a way to detangle them and I was out of time to place the feathers in those areas by hand. So I manually deleted the popping feathers after the simulation.
The feather on the head I simulated using vellum hair and used the body feather sim as a collider.


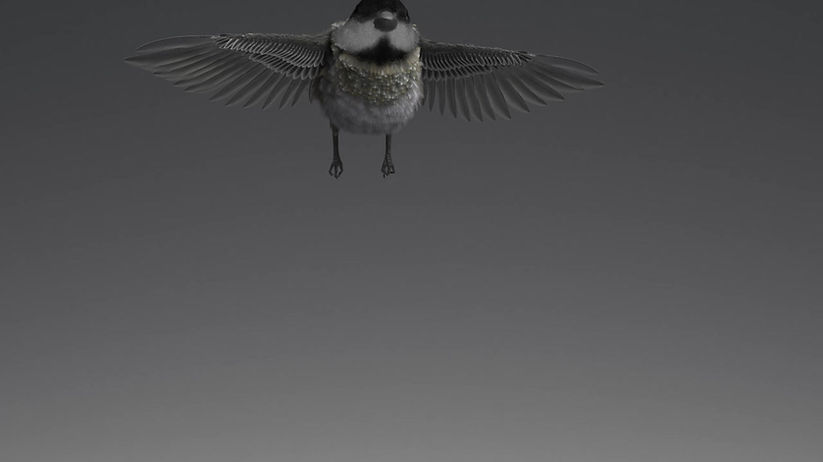
Render

Future
This is still a work in progress. In the future, I will continue to improve the groom around the eye and beak. I will also work on finding a way to make the blending of the different types of feathers look better.
For Simulation. I want to work more on the feather detangling pre sim to create a more stable simulation. There are feathers penetrating through the wing when the wings are folded. Because the shots from my thesis film won't see it, I ignored it for now. But in the future I want to fix that using blend shapes post sim.
Responsible for Grooming, Shading & Simulations
Model and texture: Shuqi Chen
Rigging: Kyra Procopi
Animation: Sarita Lam
Special Thanks to
Natalie Homewood, David Barksdale & Mikki Rose